I have an obsession for gadgets, IT gadgets, household gadgets and also kitchen gadgets. When there was an invitation for a demo and hands on, I sheepishly said yes. This is a new Master Gourmet Range available in Singapore from 1 April 2014.
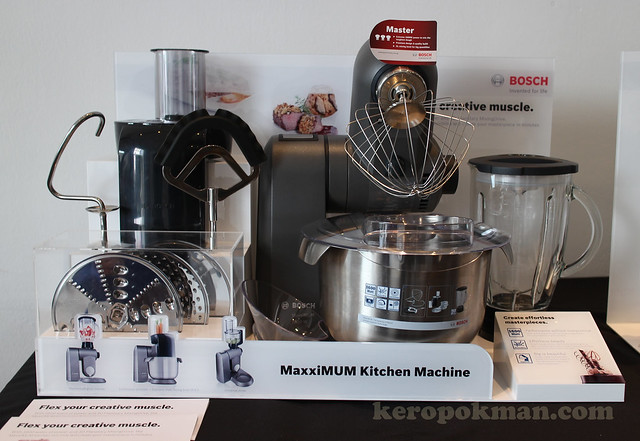
This is an upgrade from the Bosch MUM5 series that we have at home. If you are already looking for the MUM8 range recently, this new MaxxiMUM range also has the 5.4 litre stainless steel bowl. It also has a ThermoSafe glass blender (1.75 liters capacity). A nice upgrade for the MUM8.
This machine compared to the MUM5 we have, has a full metal body and it's really solid. It weights 12.6 kg if you want to know. Heavy enough to be quite stable. The MUM5 was already quite stable compared to the earlier versions made of plastic, that some say is flimsy.
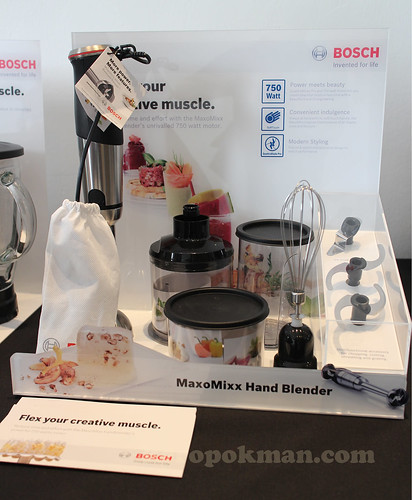
If you have been looking for Hand Blenders, the Master Gourmet range has a new MaxoMixx range. Of all the kitchen gadgets at home, I don't have this, because I have a similar one that has my name in it. (ahem)
If you want the technical details of the MaxxiMUM and MaxoMixx, you can visit the
Bosch Singapore Home Appliances Website or the
Bosch Home Appliances Singapore Facebook Page.
To demonstrate what and how this machine can perform, the BOSCH Team got Chef Stephan Zoisl to demonstrate some recipes. The recipes are included in this blog post, so you all can try it out.
Recipe 1: Welcome Smoothie
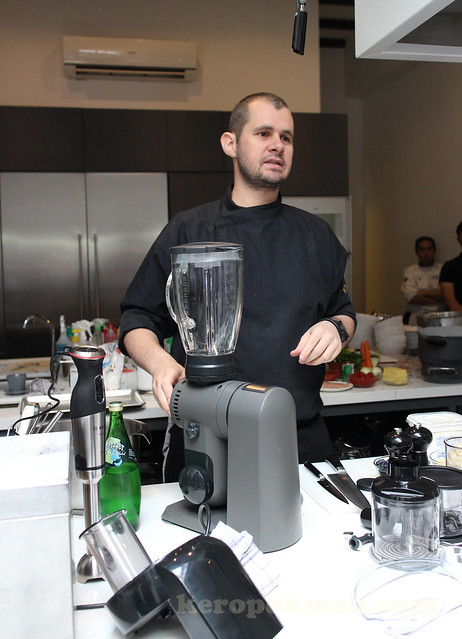
With a press of a few buttons, the MaxxiMUM is also a Transformer in the kitchen (not the cartoons one). Push the EasyArm down and you can pop the glass blender in. It comes with a ThermoSafe glass blender, so you can blend frozen fruits in it, or blend hot boiling soups.

This was Chef popping the ingredients into the machine.
Serving portions: 6
Ingredients:
- Banana - 2 pc
- Pineapple - 1 unit
- Blueberry - 500g
- Yoghurt - 500g
- Crushed Ice - as much as needed depends on preference
Method:
- Peel the bananas and pineapple. Cut them into smaller pieces.
- Place the bananas, pineapple & blueberries into the blender.
- Add the yoghurt & the crushed ice.
- Pulse the fruits and afterwards blend till all the crushed ice are incorporated.
- Pour into glasses and serve.
Here's a video I posted on
Instagram last week.
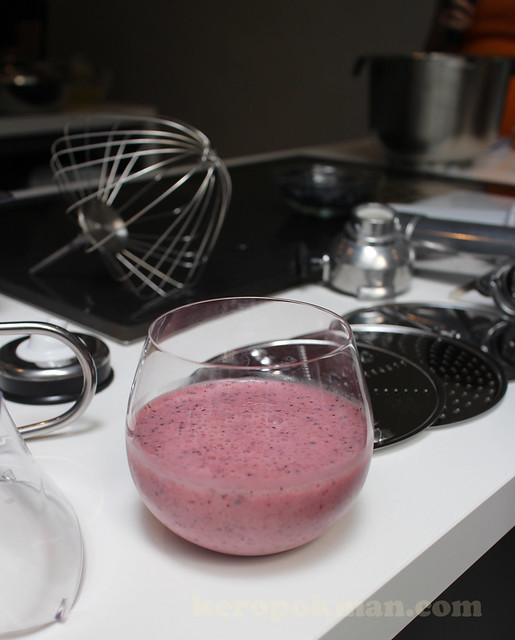
It was quite delicious. Full of anti oxidant, potassium and vitamin C.
if you happen to have a dishwasher, you can chuck the machine into the dishwasher to clean.
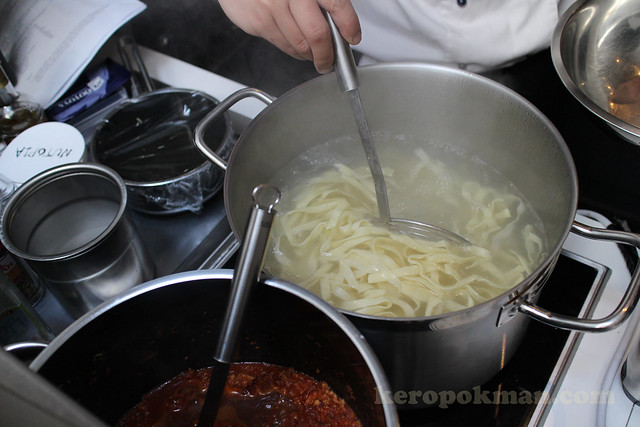
Recipe 2: Pasta Bolognese
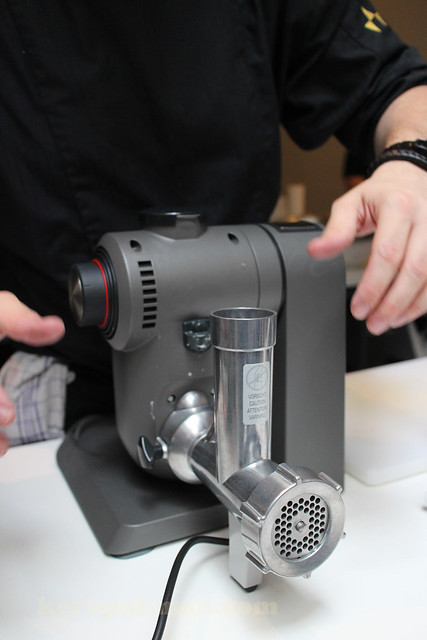
If you have more dough, you might want to purchase the optional accessory. This is the Meat Mincer. Just fiddle with the EasyArm and you can attached the meat mincer. This is for those who are caring for children or old folks and you want to know exactly what goes into their food. They need softer food and you can make them freshly at home.
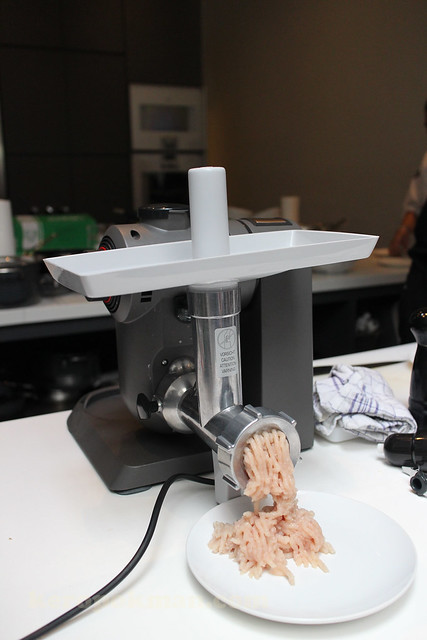
This was chef using only chicken breast to mince the meat. No additives.
If you want to see this in action, here's a video:
If you can chopped them by hands, go ahead. If not, use a machine if you are a busy working mum or dad. Here's the recipe for the bolognese:
Serving portions: 4
Ingredients:
- Minced chicken - 500 gm
- Parmesan Cheese - 100 gm
- Tomato Paste - 50 gm
- Tomato Sauce - 250 gm
- Tomato in Chunks - 250 gm
- White or yellow onions - 2 units
- Garlic - 6 pieces
- Carrots - 2 units (150 gm)
- Celery Stalk - 2 stalks (150 gm)
- Extra Virgin Olive Oil - 100 ml
- Italian Parsley - 30 gm
- Chives - 30 gm
- Sweet Basil - 30 gm
- Sugar (optional) - 40 gm
- Grade Seed Oil / Canola Oil - for frying
Method:
- Peel onions and garlic and chop them finely. (Or use the BOSCH MaxoMixx Hand Blender)
- Preheat a big pot, with a broad surface. Fry the onions and garlic in a small amount of oil.
- Once the garlic and onions turn a light colour, add the minced meat to the pot.
- Season with salt and pepper.
- Once is meat is browned, add small dices of carrots and celery. Add the tomato paste and saute for 1 minute.
- Add the tomato chunks and tomato sauce. Add some water (approx 100 ml)
- Simmer the sauce for about 20-30 minutes or till the meat is soft.
- Season with salt and pepper once again.
Tip: Bolognese sauce will develop flavour over time. You might want to prepare the sauce 1 day in advance.
Info: Original Pasta Bolognese is made with Tagliatelle, not Spaghetti.
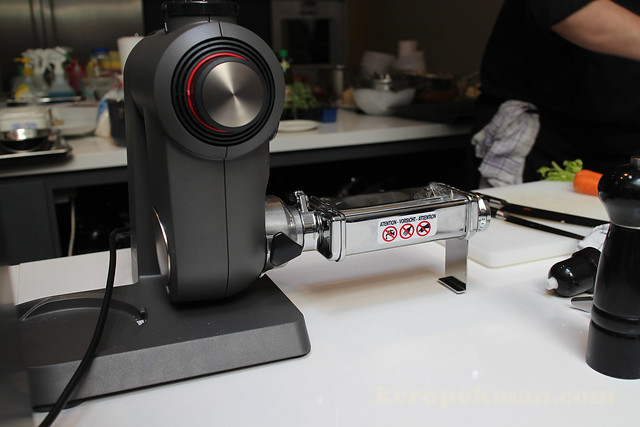
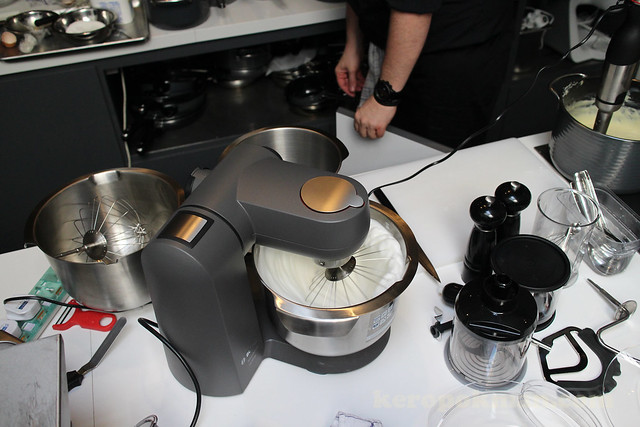
It's a demo session, so they are showing us lots of attachments that can go into the Kitchen Machine.
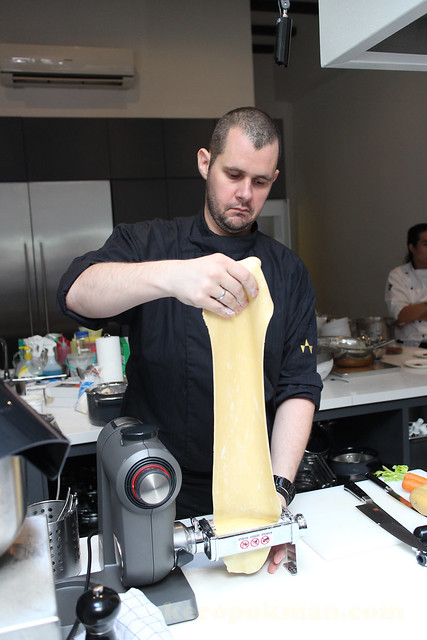
Here's the pasta attachment.
The difference I see is that the "KA" brand has the attachment higher up. This one has it nearer to the table. Up to your habit and preference. Consider the various brands and see which is better for you.
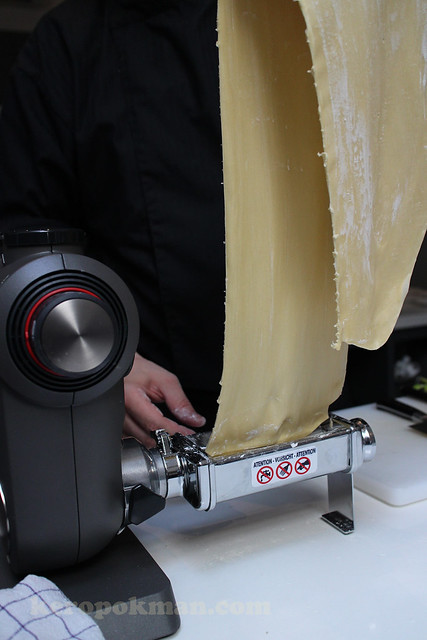
We were not given the pasta recipe, but you can search online for a recipe.
Freshly made pasta cook much faster and has a nicer texture. So if you are having a party at home. You can show off ya?
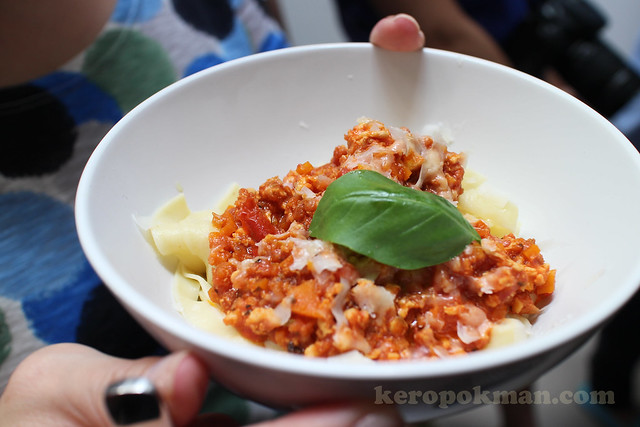
Here, this was what was served to us. It's delicious bowl of freshly made Pasta Bolognese.
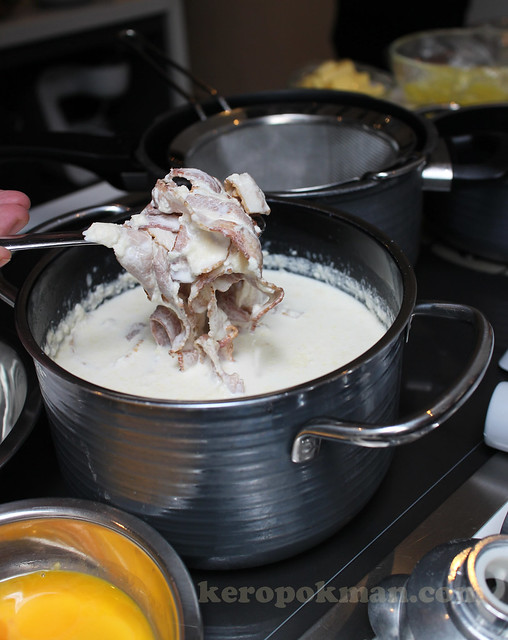
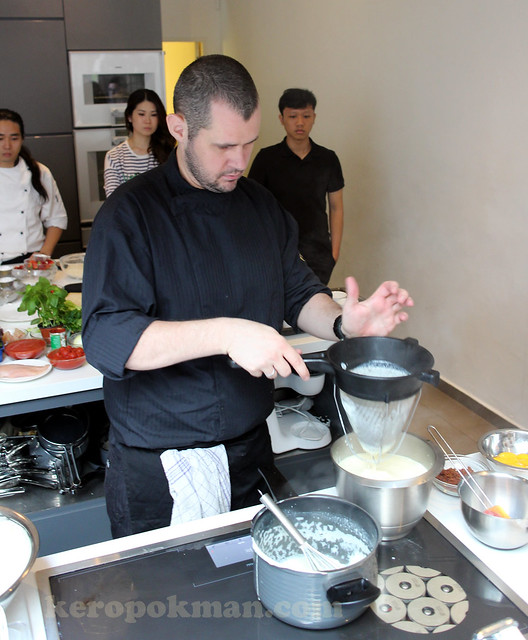
Recipe 3: Bacon Ice Cream
Does Bacon Ice Cream sounds like an awesome idea to you?
We were quite excited when we saw the recipe and it was going to be made in front of us. Chef has infused the roasted bacon in milk and cream over night. See how bacon he infused? Here's the recipe:
Serving portions: 8
Ingredients:
- Milk - 600 ml
- Cream - 450 ml
- Streaky Bacon - 200 gm
- Sugar - 100 gm
- Eggs - 8 units
Method:
- Roast the bacon in a pan till crisp. Remove from the pan and drain on a kitchen towel.
- Preheat the milk and cream, add the bacon and infuse for 2-3 hours (best overnight).
- Separately whisk the sugar and the egg yolk till creamy, stir well and add the bacon infused milk mixture into the egg mixture. Strain through a chinois and put back onto the stove. Stir constantly till you have reached custard stage. Cool down and transfer into the refrigerator.
- Once the mixture has cooled down, transfer into a mixing bowl and add dry ice. Stir and wait till properly frozen. Be careful as dry ice has a temperature of minus 78.5 Celsius.
- Alternative: You can use an ice cream machine and run the program till the ice cream has set.
Chef preparing the custard for the ice cream.
That's a chinois. I have always wonder why they call the sieve Chinese.
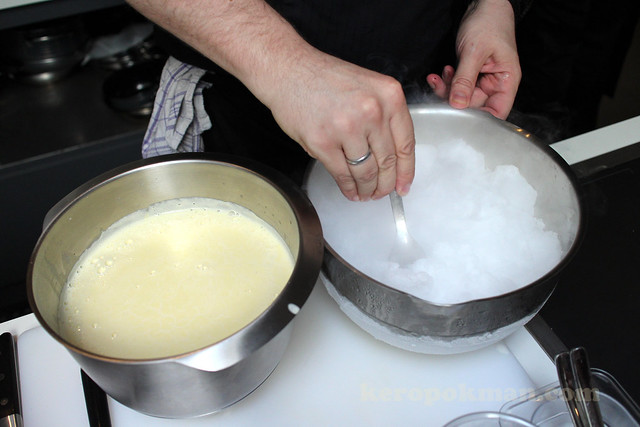
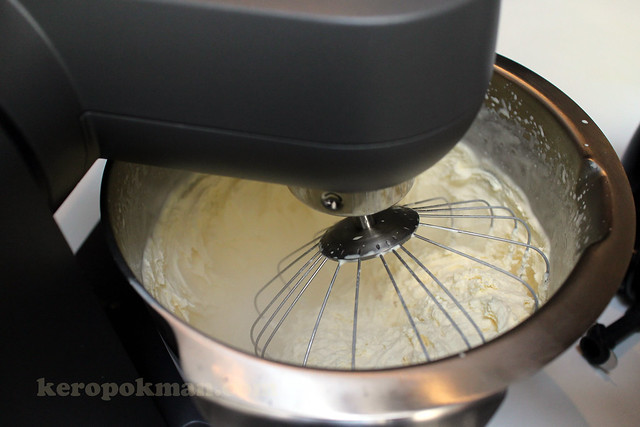
The fun part! The dry ice and ice cream mixture in the 5.4 litre stainless steel bowl that comes with the MaxxiMUM.
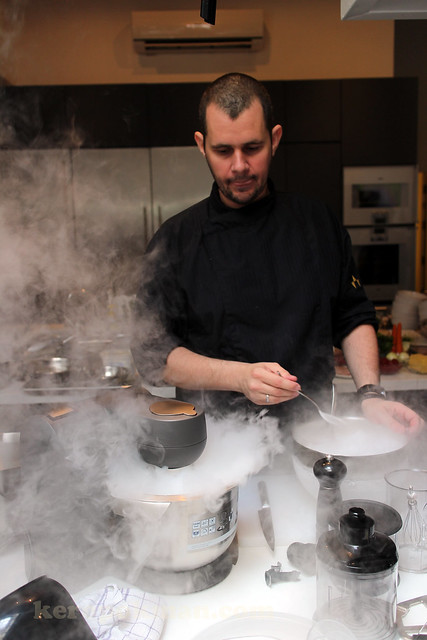
Put on the included Beating Whisk accessory and let the show begin!
The whisk is a full metal 10 wire beating whisk, and it's height adjustable, so if you are only trying to whisk 1 or 2 egg whites, you can lower the whisk down even on a big bowl.
Add in crushed dry ice. I asked the chef how it was crushed, he says, ask someone to use a hammer and hammer it to smaller pieces.
Watch as the mixture turns frozen. Making ice cream with dry ice cause the ice to freeze quickly so it would be very fine. So the texture of ice cream made with dry ice is quite pleasant. There are many shops in town that makes such ice cream but they use liquid nitrogen.
I told you I am a gadget lover. I use an ice cream maker at home. I also have a Zoku. Both will work with the recipe above.
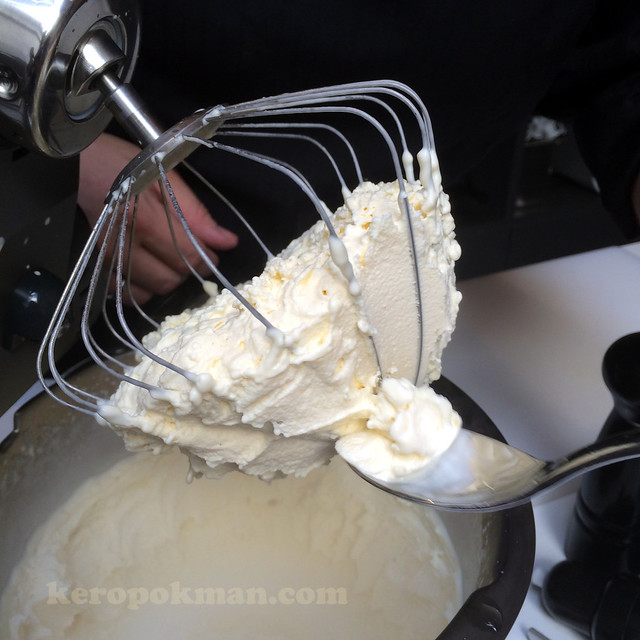
Tada! Ice cream very quickly! This was a huge quantity too!
Here's a video from my Instagram feed:
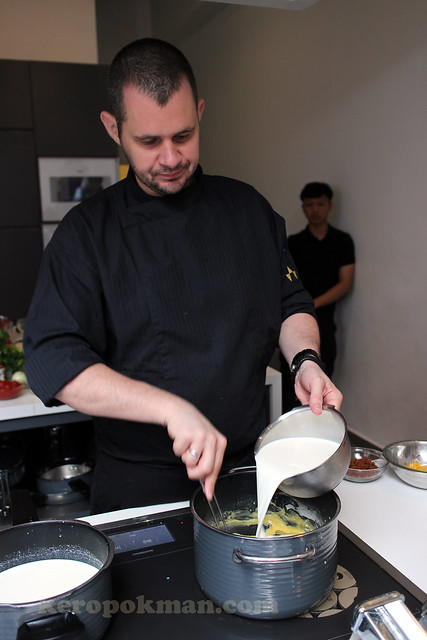
Recipe 4: Cheese Soufflé
If you want a recipe for Cheese soufflé, this is from Chef Stephan.
Serving portions: 4 - 6 (depending on the size of the baking dish)
Ingredients:
- Butter, plus extra greasing - 50 gm
- Breadcrumbs - 25 gm
- Plain flour - 50 gm
- Milk - 300 ml
- Eggs - 4 units
- Parmesan cheese, finely grated - 100 gm
- Bacon chunks - 100 gm
- Chicharoon 100 gm
Method:
- Preparing the soufflé dishL Heat oven to 200C/fan or 180C or Gas Mark 6. Place a baking sheet on the middle shelf. Butter 4x5cm soufflé dish generously, then sprinkle in the breadcrumbs and roate the dish to ensure the butter is evenly coated. Tip out any excess breadcrumbs.
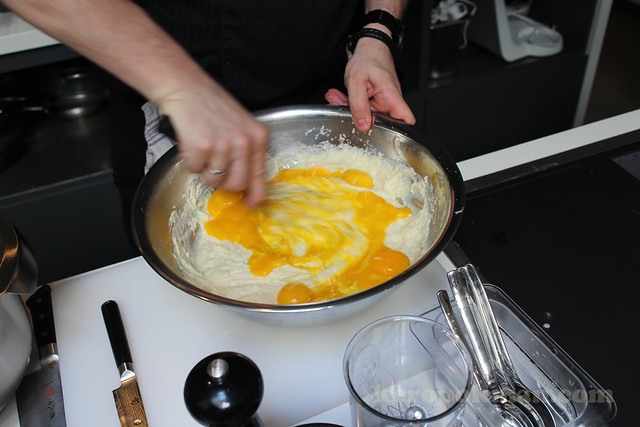
- Making a thick white sauce: In a pan, melt the butter over a medium heat, stir in the flour. Cook, stirring for 1 minute. Take off the heat and gradually stir in the milk, mixing it in thoroughly before adding more. Return to the heat and stir continuously until very thick (around 10 mins). Transfer to a bowl and allow to cool. Crack the eggs, placing the whites into a clean bowl and stirring the yolks into the sauce. Stir in Parmesan and season well.
- Adding the egg whites: Use the MaxxiMUM Kitchen Machine or MaxoMixx Hand Blender to whisk the eggs until peaks form. Take a metal spoon and gently stir the whipped whites into the white sauce in a figure of eight.
- Top-hatting: Spoon the mixture into the dish. Run a cutlery knife around the edge to create a 'top hat' effect, this ensures the soufflé rises above the rim and doesn't stick. Place on the baking sheet and bake for 25-30 minutes until the top is golden and risen and has a slight wobble.
- Serve immediately, together with bacon ice cream, bacon chunks and chicharoo.
Making of the white sauce.
Whisking of the egg whites.
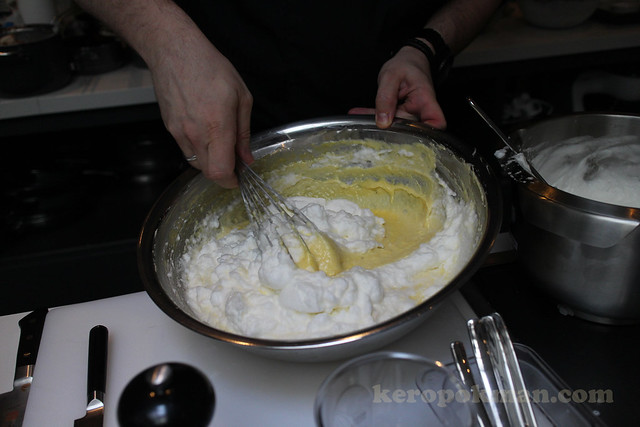
Mixing the whisked egg whites into the white sauce. Soufflé is almost ready for baking!
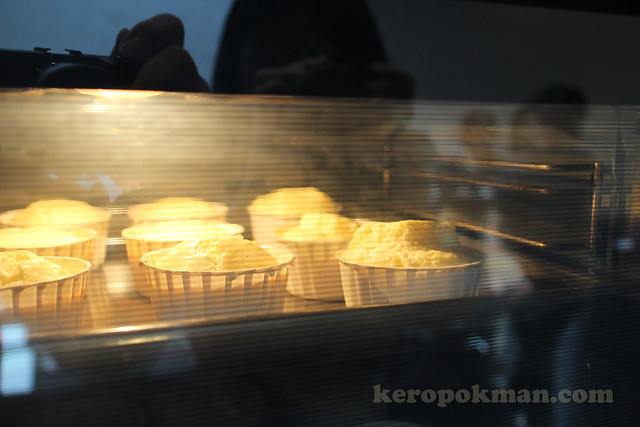
Off into the oven.
Recipe 5: Bombe Alaska
The recipe was for them to show us how to make strawberry coulis effortlessly. It requires the use of the MaxoMixx Hand Blender. It also made use of the MaxxiMUM kitchen machine to make meringue.
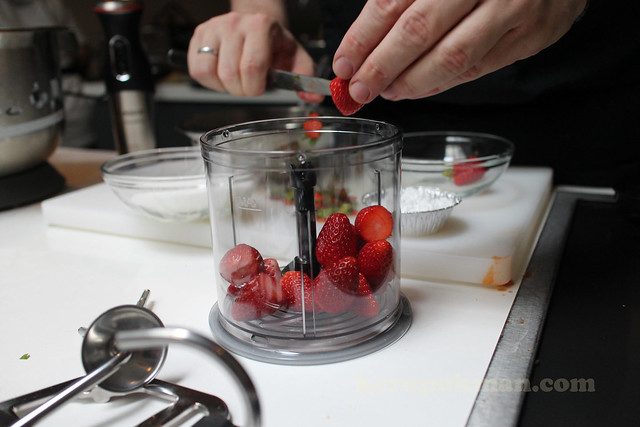
I just thought the strawberries look so beautiful, so am showing this picture!
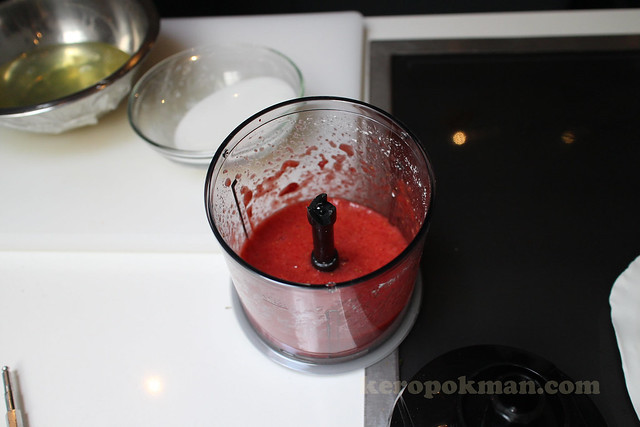
A few whizz and the coulis is ready! Here's the recipe for the Bombe Alaska:
Serving portions: 4
Ingredients:
- Caster Sugar - 150 gm
- Vanilla fresh or essence - 1 teaspoon
- Strawberries - 250 gm
- Icing Sugar - 20 gm
- Rum (optional)
- Ready Made Sponge Cake - 300 gm
- Ice cream, any flavour - 1 litre
Method:
- Cut the sponge cake into 8 round slices and arrange on trays that
will fit into your freezer. Using an ice cream scoop, place a scoop of
ice cream onto each slice of sponge cake. Cover with cling film and
freeze for about 1 hour. Ice cream has to be hard.
- Cut the strawberries and place it into the MaxoMixx Hand Blender, add in icing sugar and blend well. Set aside.
- Use the MaxxiMUM Kitchen Machine to beat the egg whites till soft
peaks form. Add in the sugar gradually, beating well between each
addition until the sugar has dissolved and mixture is glossy. Beat in
the vanilla. Transfer into a piping bag.
- Transfer the ice cream / sponge cake slices onto an overproof tray -
pipe beautifully the egg white over the ice cream. Make sure it's fully
covered.
- Use a blowtorch to burn the meringue. Alternatively you can use the
rum and flame the Bombe Alaska. If you don't have a blow torch - preheat
the oven to 200 C and bake for 4 minutes.
- Place the Bombe Alaska onto a place and serve with the strawberry coulis.
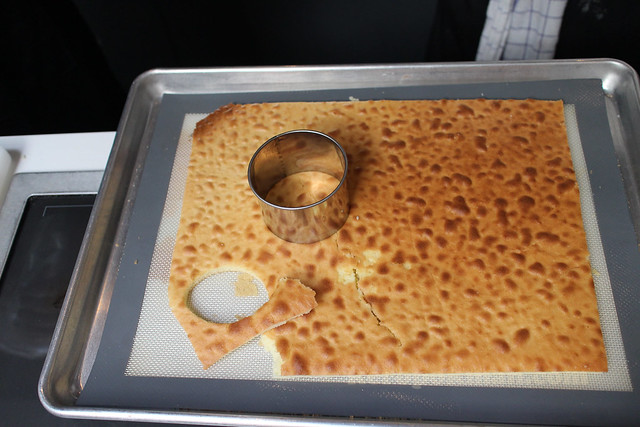
This was the sponge that Chef has prepaid earlier. Use round moulds to cut out round bottoms for the Bombe Alaska.
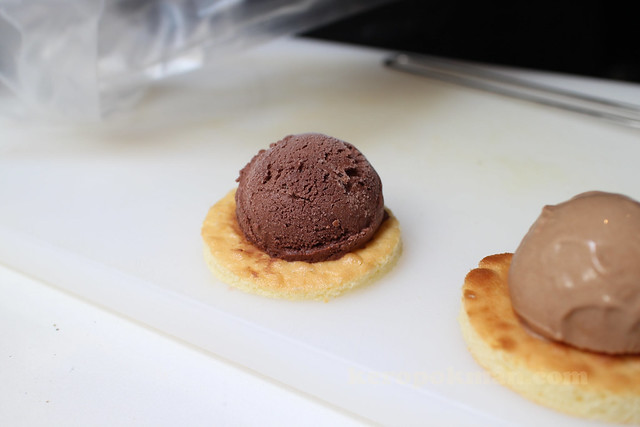
Before you pipe the meringue on the ice cream, make sure they are super super hard. Melted ice cream is a no no!

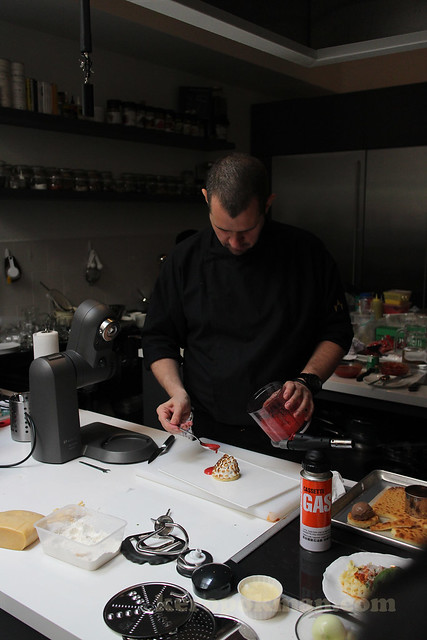
Squirt squirt squirt! Easy does it!
After torching, pour the coulis around the Bombe Alaska
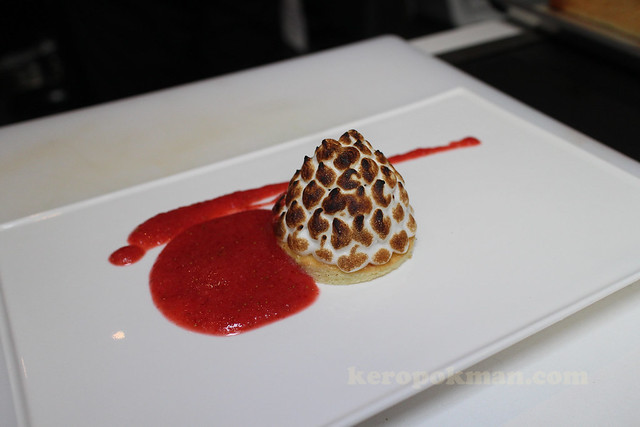
Tada! It's ready! Serve immediately and don't waste time! Ice cream inside will melt!
Some info for you if you plan to buy the machine for yourself or a present to your mum.
If you are planning to give your Mum a Mother's Day present, from 11 April to 11 May 2014, Bosch is extending a special price of up to $200 off its range of food preparation appliances, coupled with complimentary gifts with purchase.
The Bosch MaxxiMUM Kitchen Machine MUMXL20T (Titanium Silver) will be $200 off at $1299. It also comes with an extra bowl valued at $109 for the Mother's Day promo.
The Bosch MaxxiMUM Kitchen Machine MUMXL40G (Granite Grey) will be $200 off at $1499. It also comes with an extra bowl valued at $109 for the Mother's Day promo.
The Bosch MaxoMixx Hand Blender MSM87180 will be $10 off at $209 for the Mother's Day promo.
If you want to touch the real thing and see demos, you can head down to BOSCH Live Kitchen at Tangs Orchard, B1. On 6 Apr, 12-2PM there will be a demo by Chef Trish. On 12 Apr, 3-5PM, there will be a demo by Chef Gina.